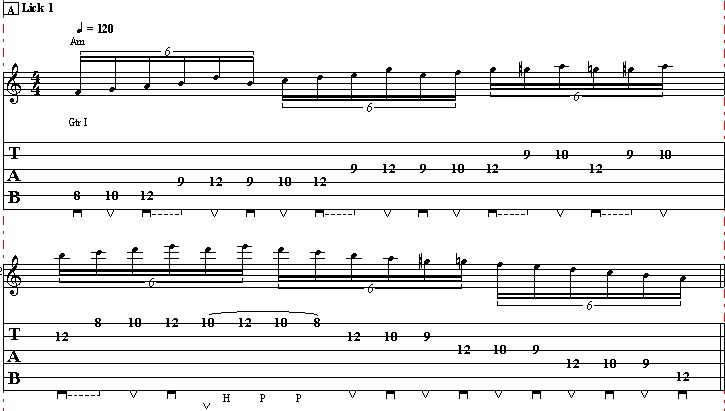
Check out this free Acoustic Guitar Lesson – Introduction To Travis Fingerpicking Technique from Guitar Control instructor Sean Daniel. Be sure to click the link for the free tabs to follow along with the step-by-step video instruction.
[ninja-popup ID=715]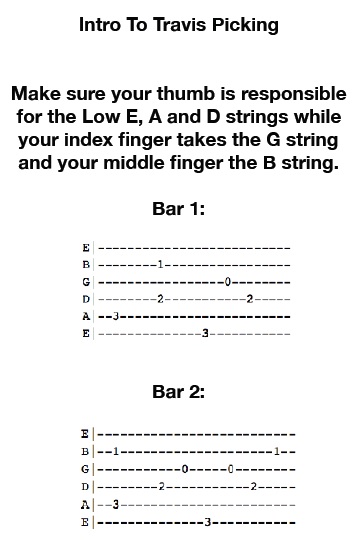
Introduction
What’s going on everybody? Sean Daniel with Guitar Control here and today we are gonna get our finger picking on, specifically a Travis style finger picking. So you’re gonna want to click the link below because I’m gonna tab out all the stuff, but it really isn’t even just about the tab, it’s kind of about the techniques that make this sound a certain way because beyond just kind of like your basic intro to finger style guitar playing.
Travis Picking Technique
So basically the first chord that we’re gonna use is gonna be the tried-and-true C major. Alright, so ring finger third fret of the A string, middle finger 2nd fret of the D string and the pointer finger 1st fret of the B string. The fingers that you use are actually really important because the first thing we’re gonna learn is gonna sound like this… Okay so it’s really important that your ring finger leads off here because it’s gonna be jumping back and forth from the third fret of the A string to the third fret of the E string.
All right now the next most important thing is kind of where you have your hand in relation to the string set, this kind of style picking is really dependent on repetition and building good repetition is kind of anchoring your hand and getting your fingers under the exact same strings that you want to every time. So your thumb is pulling triple duty, it’s gonna be responsible for the low E, A and B strings. Now you really only need your pointer finger and your middle finger. I’ve seen some people do it with just one other finger but I really suggest that you try to get both these fingers in the game, it makes things a lot easier and it’s a lot easier to build up speed once you get it going. Your pointer finger is gonna kind of chill right here under the G string and your middle finger is gonna be responsible for the B string. So at the moment the high E string is kind of getting left out of the party, it’s sad and eventually, we’ll join in, we really just need pointer finger on G and middle finger on B.
Now if you look this is going to be the kind of pattern that we’re doing. My fingers are kind of coming in to the string like that, it’s kind of important that you get that kind of look going on right there because if you’re doing this again, not that you can’t do this again, I’ve seen a lot of different people do it. This is just the way I’d do it and the way I’ve seen a lot of other really great players do it. You kind of want to have it going into your hand because once it comes in, it goes right back down where it was.
Alright so what we’re gonna do is get this going… now and the way we’re doing this is we’re starting by just getting your thumb on the root note of the chord, so the third fret of the A string is a C and then the next thing we’re gonna do is we’re gonna have your thumb go down to the D string and then it’s gonna join in with your middle finger plucking D and B which again that chord shape gives us those notes. I don’t really have to tell you which notes, I just have to tell you the strings again, on the tab the notes are going to be there, but it’s more about just which strings you hit within a chord.
Now, this sounds a lot different then… really kind of similar but, the nuance of it is that as soon as I pick the D string and the B string, but the pressure in my fretting hand is letting go, it’s not coming off, but it’s not pressing, it just kind of kills it, it dead ends the chord. so I’ve got root and then a quick hit and then the next thing you’re gonna do is your ring finger is gonna go down to the E string third fret, so we going from a C note to a G note; a G being the fifth of the C chord, so C, D, E, F, and G. A 1 and A 5, that note is actually in the chord but now it’s responsible for the bass note, so a D and G and notice it’s really dead after that initial hit, it goes away and it kind of creates a cleaner maybe more Travis style sound… then the sustain of it, not that there’s anything wrong with that, it’s just two different techniques to kind of get different individual sounds out of the same chord.
All right, so we’ve got a string D and B and a low E string. Now the next two notes your pointer finger has just been hanging out on this G string not doing anything, we’re getting it in the game finally after we hit the third fret on low E string, its jumping into action, pointer fingers gonna play open G. So and then right after that it’s gonna kind of launch this little chain reaction that your thumb is getting the D string. Okay so if we just track what your thumb is doing, a D, E, D, so it’s really a very steady rhythm that your thumb is responsible for kind of holding down right and then your fingers are just adding a little bit of melody, a little bit of the chord into it; one, two, three and four, one, two, three and four. So we’ve got so far… all right a D and B and G and D, one, two, three and four, one, two, three and four.
Now after that we’re going to add another pattern that you can add on top of that all right. So now the downbeat, the one count of the next bar is gonna be A and B alright, and again same thing as before, you hit it and then you quit it, one and two. Now the two is still gonna be your thumb going down to the D string because one, two, three, four, one, two, three, four with your thumb is very constant throughout the entire thing, but we’re adding the B string to the one count, now one and two and the and of two is gonna be a pointer finger, so A and B, D, G. Now after that it’s really just three and four, which is really easy, because if you have your thumb used to going from A to D to E to D that’s really easy because we go thumb, index, thumb, middle. Okay so E, G, D, those are gonna be the last two counts, the last four notes you’re gonna hit, three and four and.
Alright, one, two and three and four and one, two and three and four and one, two and three and four and. So once we add those bars to each other, we have one, two, three and four, one, two and three and one, two, three and four… So really kind of choking those notes makes a big difference. At first it seems like a lot is going on.
The most important thing really is the pulse of your thumb, you’re totally keeping the count, A, D, E, D, A, D, E, D, A, D, E, D, with your thumb, this is just an open string, so really kind of a traditional Travis style finger-picking thing we got going on here, you can do these over any different chords, you can switch it to an A minor chord or a C for Travis picking Technique.
Conclusion
Alright, so really I think The Travis picking Technique is a really cool style of guitar finger-picking. It’s something that will really make you more thoughtful about the timing of a chord. A lot is going on, you’re using your left hand to not only fret the right notes in the chord, but to also mute stuff, so the timing of it really kind of jumps in with your fretting hand whereas a lot of times, maybe if you’re just working on your timing, you’re thinking of it as either finger style or strumming or maybe just your right hand or your left. If your left ear it’s solely responsible for the rhythmic element of what you’re playing, but that’s not true, your left hand is also instrumental in making this kind of thing sound good.
So hopefully you got a good intro to Travis picking Technique and something that can kind of add into your practice then you’re in luck because we have other great videos going on all around the Guitar Control channel, which I’m sure you’re subscribed to, that you can click right here from other great instructors, myself included. And definitely hit us up in the comments if you have any feedback on this video or anything else you’d like to see more of.
Thanks for watching Introduction To The Travis picking Technique.